How to assign custom fields from Shopify in SEO.AI and publish
If you have not already created custom fields in Shopify, make sure to do that first, here is how you do it.
1. How to create Shopify fields and assign and create SEO.AI fields
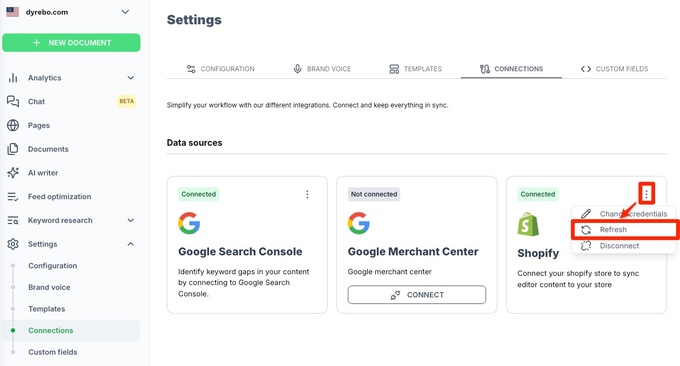
The first thing you are going to do after creating the custom field is refresh your Shopify connection.
To do this, login to SEO.AI, go to "Settings" → "Connections" → Click the dots on the Shopify connection → click "refresh".
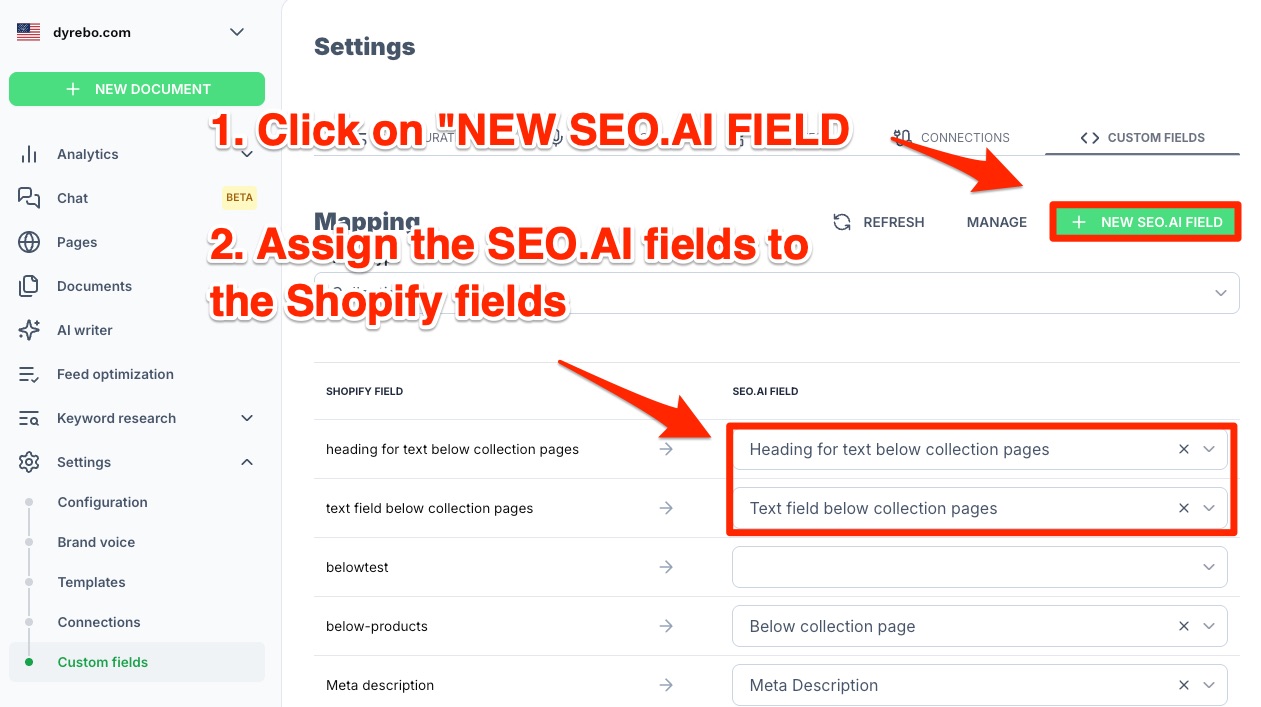
Then navigate to "Custom fields" within settings and pick the correct content/page type. The custom fields you assigned to your template in Shopify, should show there, with an empty SEO.AI field next to them like on this image.

Now you need to create a field in SEO.AI, that can be done by clicking on "NEW SEO.AI FIELD", giving it a name and a description (description is not mandatory).
2. How to insert and publish text using the custom fields
Now that everything is set up, we are ready to start filling text into these fields.
To insert text into the custom fields do the following:
- Enter a document for the correct page type
- Optimize your text, if you have not done so already
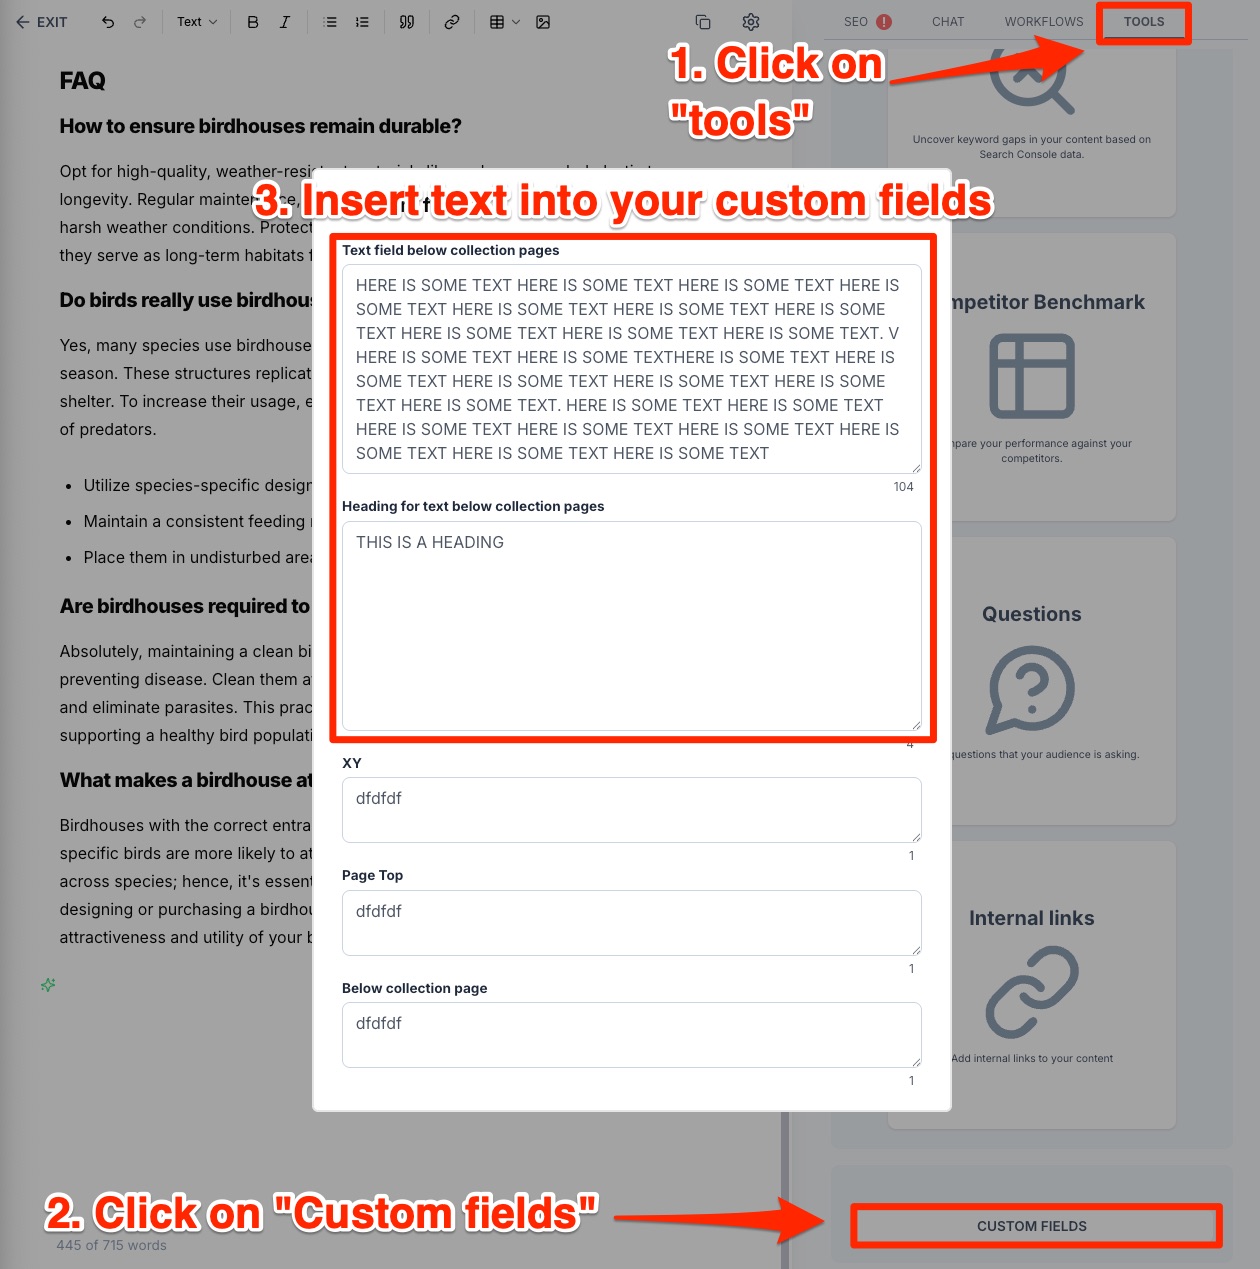
- Click on "tools" in the top right hand corner
- Click on "custom fields" and insert text into the fields
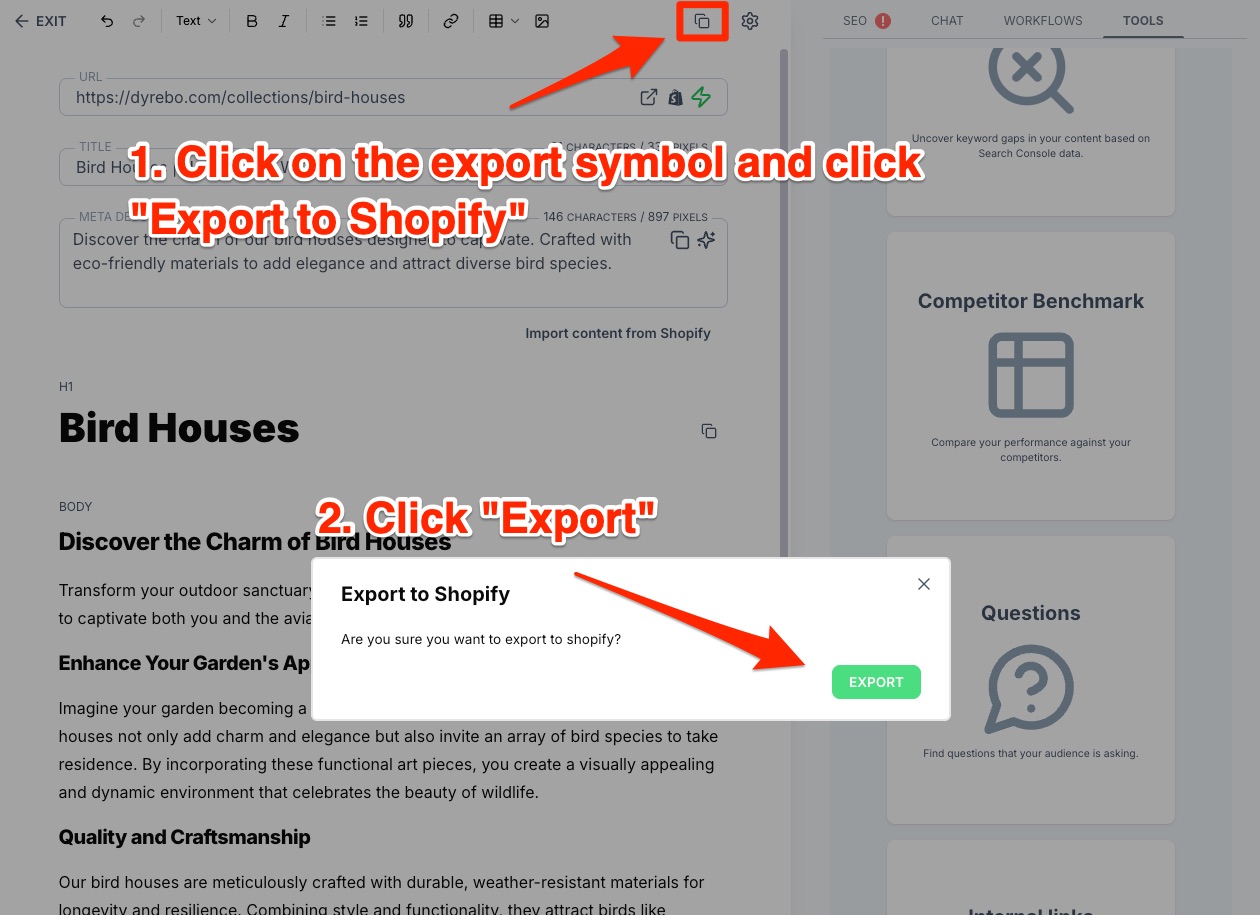
3. How to publish the content to Shopify
To export your content to Shopify, click on the export symbol → "Export to Shopify" → Export → view the content
And that's it! You are now be able to export content onto Shopify. With future updates you will no longer need to open the "custom fields" section and will be able to add the content directly in the editor instead of copying after creating.
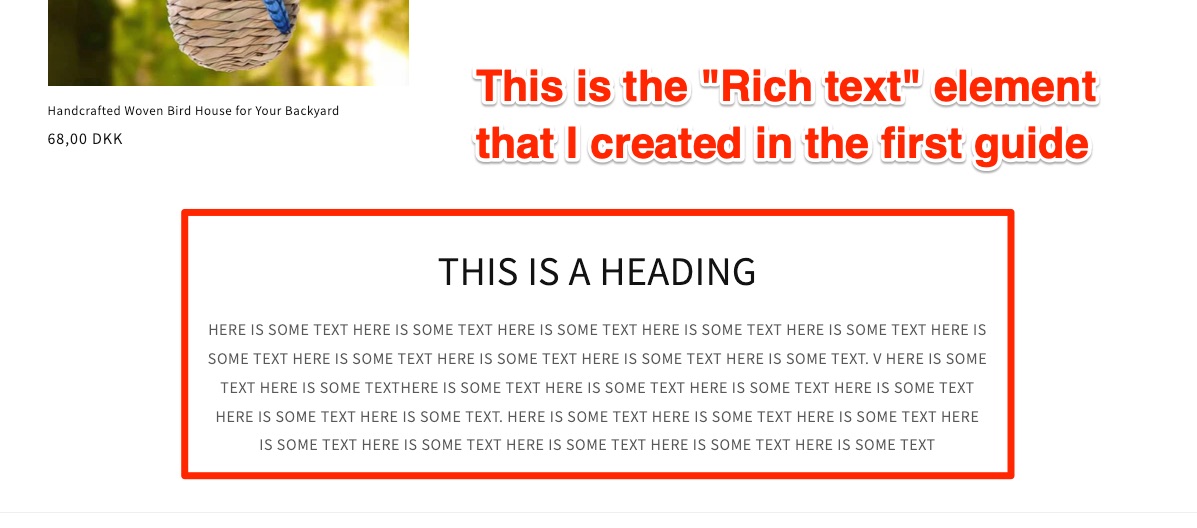
Here is what the example that i have used for these guides look like: